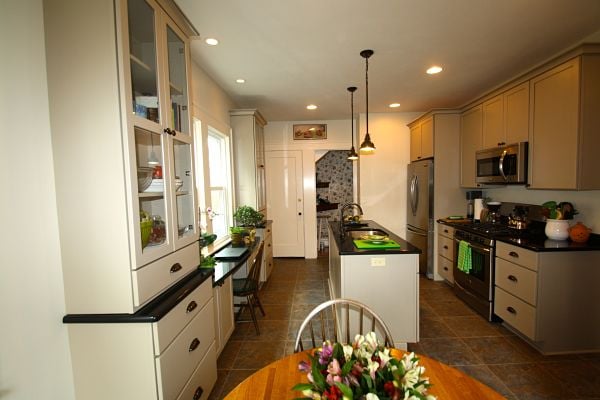
The owners of a home located in the City of Syracuse that was built in the 1920s transformed their galley kitchen to create a functional space with practical storage and efficent work areas.
New cabinets, countertops, appliances, fixtures, lighting and flooring give a bright new look and feel to the room. The kitchen was designed to blend with the architectural style of the home.
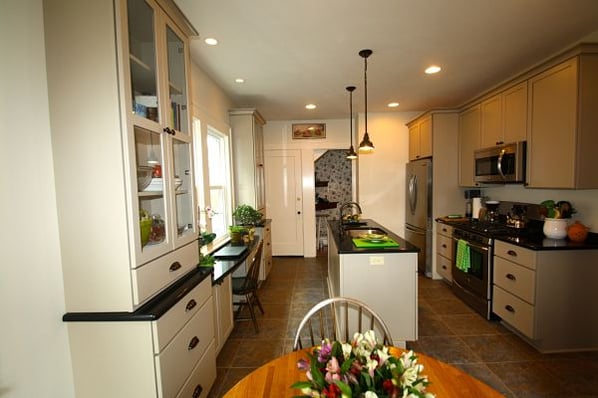
This galley kitchen remodel features an island, Shaker-style cabinets, stainless steel appliances, lighting over work areas, an area for informal dining and a desk.
Homeowners’ Objectives
1. Modernize the kitchen. The layout of the kitchen was not suitable for modern appliances and the way people use their homes today. The homeowners wanted to design the space to better meet their needs and to update the appliances.
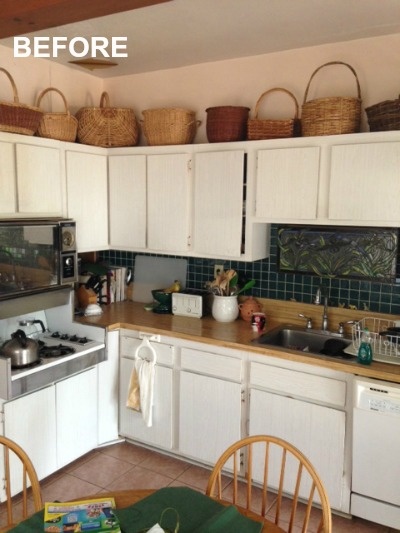
The layout of the kitchen remained virtually unchanged since the home was built. Though new appliances had been added over time the configuration had become outmoded.
2. Add more storage space. The slab door cabinets were old and did not close properly. The storage space was also inefficient.
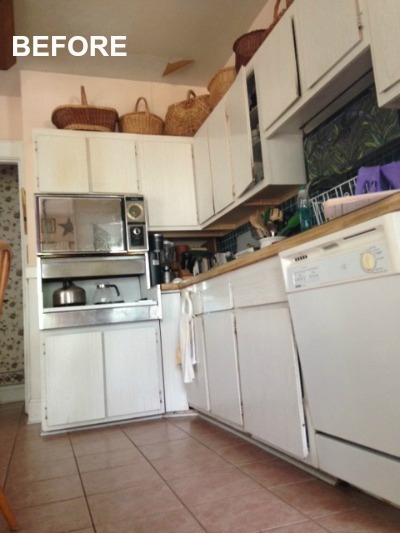
3. Add more lighting. There was insufficient general and task lighting in the kitchen.
4. Create a functional workspace. The kitchen lacked counter space for food prep and the placement of appliances made it difficult to work in the room. The homeowners also needed an area where they could work on a laptop computer.
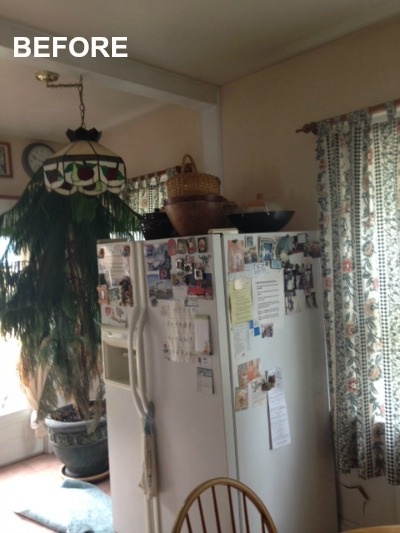
The refrigerator was placed against a wall near a window and was an obstacle in the room. A hanging Tiffany-style light fixture from the 1980s was hung from a beam to bring more light into the kitchen.
5. Replace the flooring and eliminate a tripping hazard. Threshold transitions created a tripping hazard in the home. The ceramic tile kitchen floor was higher than the wood floors in the thresholds of adjoining rooms.
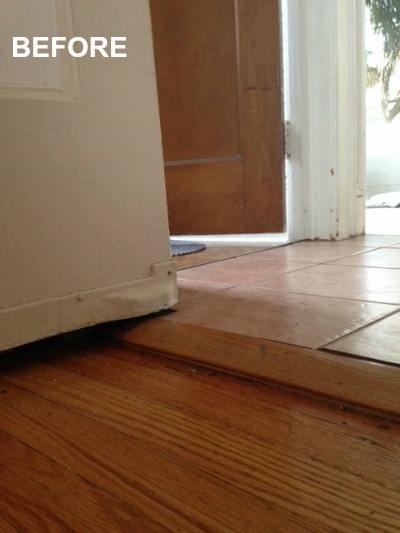
Thresholds between the ceramic tile floor and wood floors were not level.
6. Design the new kitchen to complement the period of the home. The remodel needed to blend with the charming architecture and character of the home.
McClurg’s Solutions
1. Redesigned and updated the time worn kitchen.
The primary design challenge was to create a practical space for the homeowners. An island was added to provide an area for preparing meals and for cleanup. The refrigerator was moved near the stove and sink to create an efficient “kitchen work triangle”.
A multipurpose desk area was built under a window to provide a space for working on a laptop that could also be used for food prep or for a buffet set up when the homeowners entertain. The old ceiling, wallboards and flooring were removed during the demolition phase to provide access for new wiring and plumbing to accommodate the design changes.
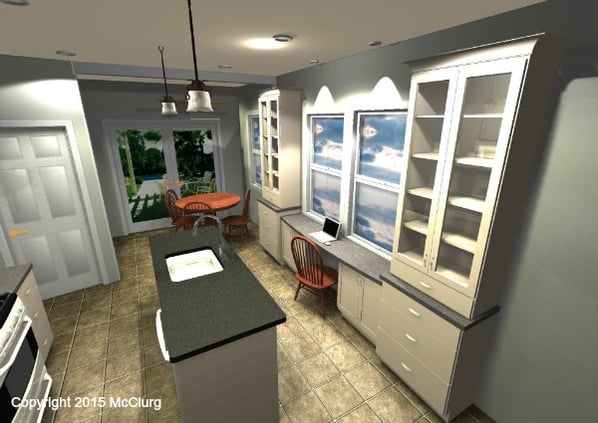
Drawing View: The new plan not only improved the work area but more cabinets were added for storage. The informal dining area was moved from the center the kitchen to the back.
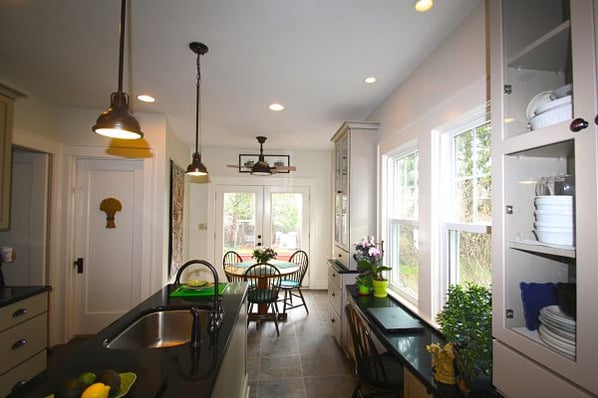
Finished View.
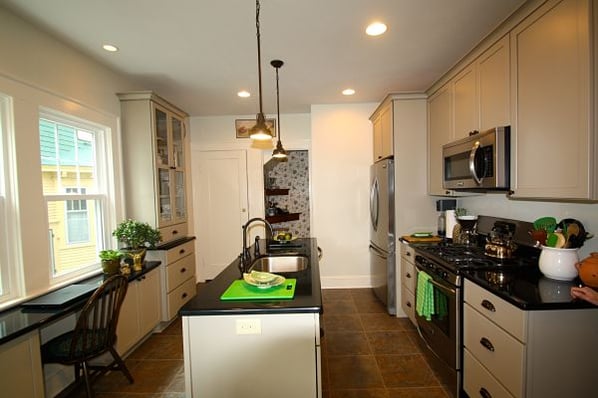
The design created efficient work areas in the kitchen. The sink on the island is conveniently located across from the gas range and microwave oven. The counter surfaces on the perimeter and island now provide adequate space for food prep and baking.
2. Replaced the cabinets and improved storage space.
Accessible storage was a factor in the design. The homeowners selected maple Bishop Cabinets with the “Quakerstown” door style from the Heritage Essentials Series. The painted finish is low sheen “Taupe” with an “oyster” glaze. Full extension deep storage drawers with soft close glides were used. Black quartz counters from Cambria were selected to complement the cabinets. Glass doors were used on upper cabinets and interior puck lights were installed to make contents visible. Cabinets were also brought up to the ceiling to increase storage space.
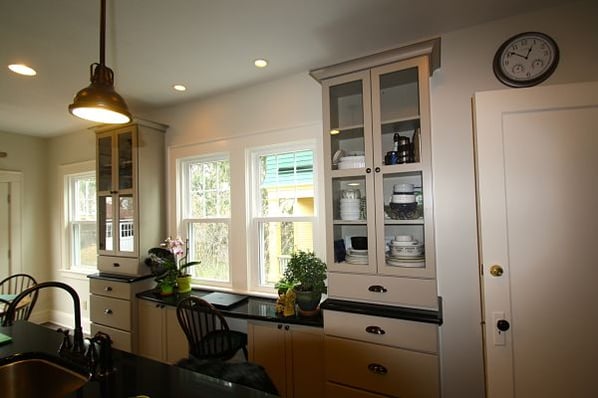
Storage needs of the homeowners were carefully considered in the design of the kitchen. Deep storage drawers provide accessible storage for pots, pans, bowls, bakeware and utensils. Upper cabinets with glass doors enable the homeowner to display items and easily see contents.
3. Designed lighting solutions for the new kitchen work areas.
Six-inch recessed lights with compact florescent bulbs were used for general lighting in the kitchen. Decorative light fixtures – the pendant lights over the island and fan light over the dining area – were added. Under cabinet lighting was addressed by installing 16-inch Xenon fluorescent strips.
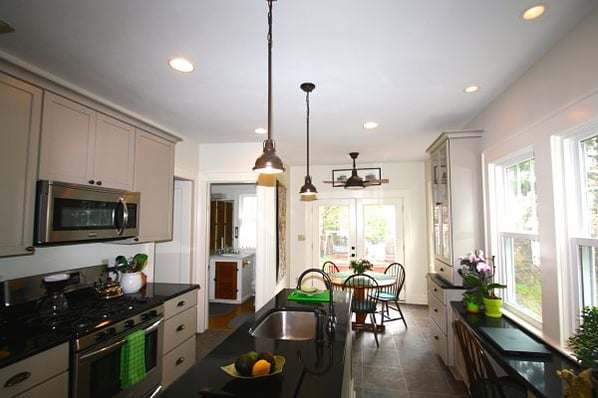
Lighting in the kitchen includes the natural light provided by the double window and patio doors. The kitchen was rewired for recessed lights over work areas, decorative pendant lights over the island, a hanging fan light over the table, under cabinet lights near the range, puck lights in the cabinets with glass doors and lights under the vented microwave unit.
4. Designed the workspaces to be practical and functional.
The overall design of the kitchen improved the flow for people in the room and made the cooking and dining areas more functional. New stainless steel appliances from Frigidaire were selected to replace outdated appliances. A microwave/venthood optimizes space in the kitchen and was placed over the range.
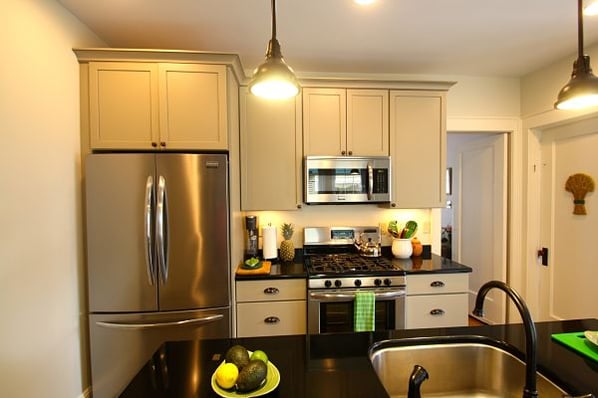
This galley style kitchen is designed for efficiency. The refrigerator, range and sink that form the kitchen work triangle are conveniently located for the person who prepares meals.
5. Replaced and designed the flooring to be level with adjoining rooms.
The ceramic tile flooring was removed and replaced with luxury vinyl flooring. Thresholds were integrated to allow for a smooth transition into adjacent rooms.
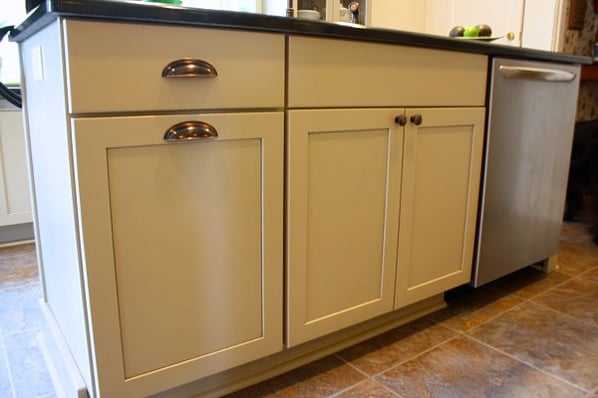
Easy care luxury vinyl flooring was selected for the kitchen. Its neutral pattern looks like ceramic tile but it is much more forgiving when items are dropped and spills can be easily cleaned.
6. Designed the new kitchen to complement the home’s architecture and style.
Casings on doors and windows were replaced during the remodel with new trims that replicate the original style of moldings in the home.
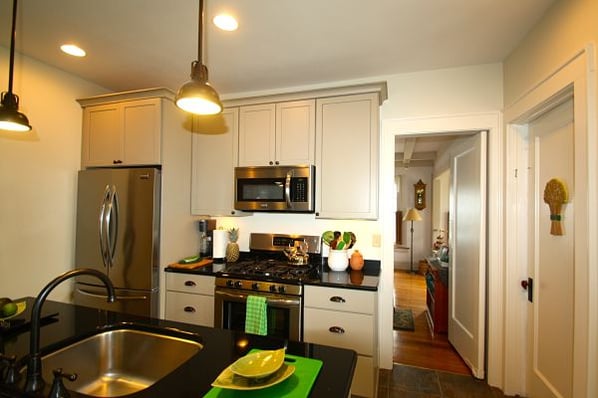
The décor of the kitchen blends with the style and character of the home. Hardware on the cabinets, decorative light fixtures, colors of the walls and cabinets, trims around doors and windows and the flooring selected match of interior style of the existing rooms and furnishings.
Related Posts
Project of the Month: A Stylish and Practical Kitchen Addition
This month’s featured project is from a colonial style home built in 2000 in Manlius, NY. The...
Project of the Month: Kitchen With Two Islands
The kitchen is the heart of a home. It’s important that the space meets the needs of the people who...
Remodeling Your Kitchen: An A-to-Z Wish List Guide
Most people begin a kitchen remodeling project with a “wish list” – everything you NEED and WANT...
